

:: in which we expose the lying liars of the internet ::
The internet lies. Specifically, DIY articles about making your own fill-in-the-blank lie. They make every project sound so easy and effortless. “I’ll never buy store bought again,” you’ll cry euphorically as you sip your bulletproof coffee spiked with hand-churned butter in a hand-thrown ceramic mug, while wearing your hand-knit boho chic sweater and fingerless gloves, surrounded by handmade leaf art you pinned to your Autumn Décor board on pinterest.
Listen, I love making stuff from scratch. You know I do. But I have to be honest with you and tell both sides of the story. Sometimes things require too much effort. Sometimes it’s better to buy the damn thing at the store. Truth be told, I do like projects and I often find that it’s worth all the effort to go homemade, just for the satisfaction of doing it myself. But it’s not for everyone.
Such has proven to be the case with mustard. At the beginning of summer, my handsome husband and I were wandering down by the river when he noticed all the wild mustard growing along the banks. “We should make our own mustard,” he said. [Please note: this was HIS idea. So you see, the shenanigans aren’t always my fault.]
“Can you do that?” I asked. Which was a stupid question because hey, I should know by now that you can do almost anything yourself. It just doesn’t always make sense to.
“Sure, mustard is just seeds and vinegar ground into a paste. Should be easy,” he said. Yes, in theory it should be easy. But examine, if you will, these two versions of how to make mustard:
Homemade Mustard The Michael Way
Step 1: Grind mustard seeds and vinegar together.
Step 2: Eat it.
He’s all about simplicity. But he’s the idea man. He didn’t actually make the mustard, so I will now enlighten you as to the real way to make mustard.
Homemade Mustard The Jessica Way
Step 1: Find some mustard plants. Easy, considering we had already identified a patch of it growing by the river. I found another large patch up in the front yard. It’s important to know that mustard has yellow blossoms. Interestingly though, I found several patches of purple and white mustard around our property.
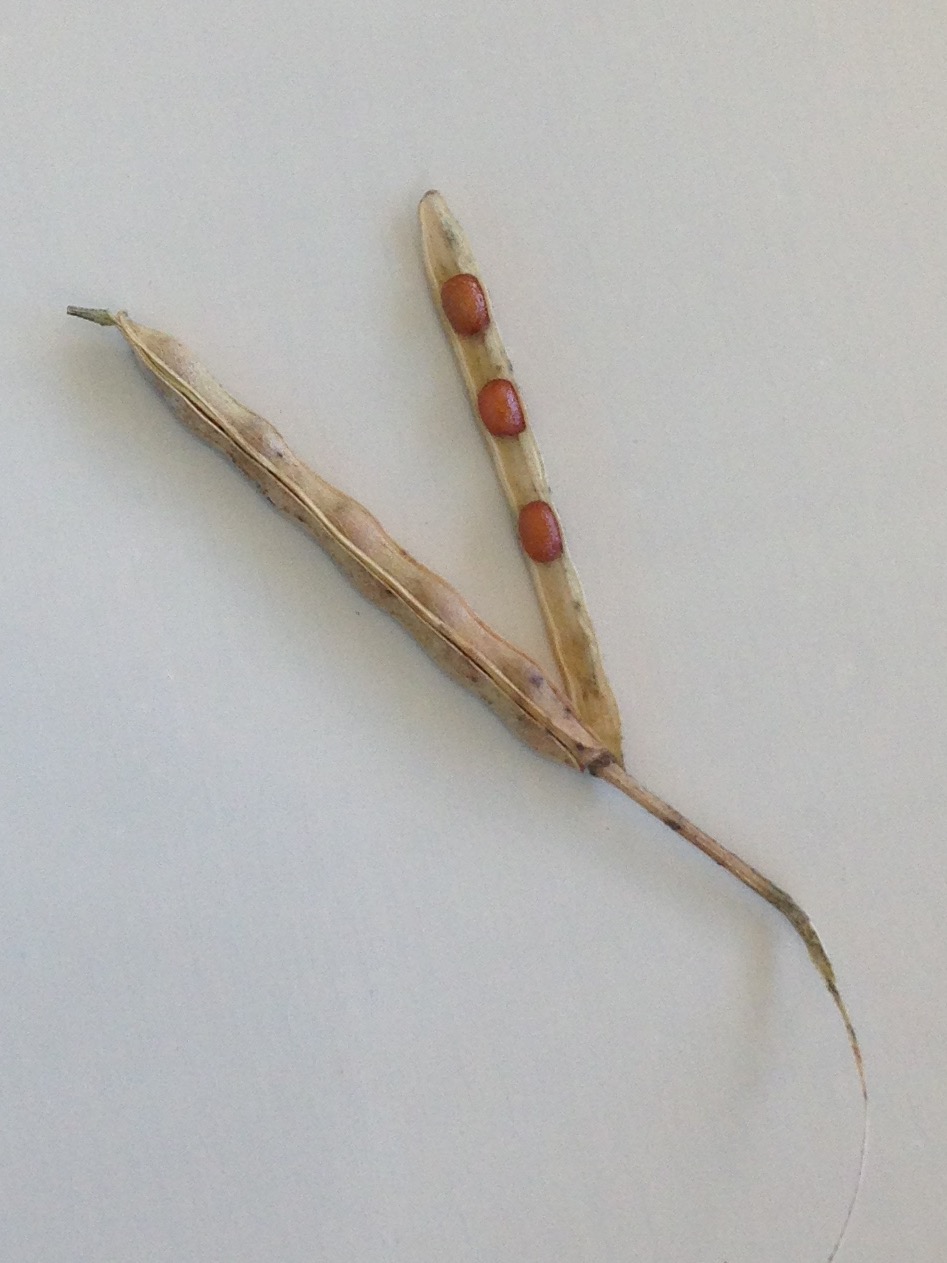
Step 2: Figure out where the seeds are. I know plants. And I went to college. And I’m a teacher. But I swear it took me a week to figure out where the stinking seeds are on a mustard plant. I kept looking around the flowers for some reason, but that is not the right place. It turns out mustard seeds grow in little pods attached to the stalk of the plant. Now that I had found the seeds, I just had to wait for them to dry up so I could harvest them.
Step 3: Run a test batch. I saw that some of the mustard was drying up a lot faster than the rest. Specifically, the purple and white blossomed plants. The yellow plants were still nowhere near being dry. I harvested some of the dry seeds from the purple and white plants and ground them into a paste with water, just to test it out. It tasted sufficiently mustardy. No surprise there.
Michael wondered why the seeds weren’t round, but rather needle shaped. A smart person would realize that is an important question. But a person who really wants to hurry up and make her own mustard will shoo away this observation by saying, “There’s more than one type of mustard, you know. Pfft.”
Step 4: Stew on the nagging question of why the seeds weren’t round and do some more research. I learned a very important, humbling lesson on this step. I read every book and internet article I could find on mustard, and looked at tons of pictures of mustard seeds. What I discovered is that the plant I had ground into paste and EATEN was not mustard at all. The plants with the purple and white flowers that closely resemble mustard plants are called Sweet Rocket. Thank God, they are edible. Otherwise I would be writing this blog from beyond the grave and wouldn’t I get a lot more web traffic then!
Anyway, I had three good hints that these plants were not mustard (blossom color, seed shape, different harvest timing), but I foolishly ignored the hints because I really wanted them to be mustard plants. I have since done a lot more reading about foraging safety and I learned this: if you still need a book to help you identify a plant, you’re not ready to eat it. You have to be 100% sure. I learned that from this book. I also learned how to positively identify a mustard plant.

Step 5: Wait for the real mustard pods to dry. This involves checking the plants frequently to see if the pods have turned brown. You don’t want them to get too dry though, because then the pods will split open and spill their seeds on the ground. That’s good for next year’s mustard crop, but not so good for collecting seeds this year.
Steps 6, 7, & 8: Wait and wait and wait for the pods to dry. I thought the pods would be dry when I got back from my vacation to California in mid-July. Then I thought the pods would be dry the following week. When they were still green, I figured the pods would be dry by the middle of August. And then the end of August. By September I was dragging myself out to the mustard plants half-heartedly, scolding them bitterly when I got there. “Let me guess. Still not dry, right?”
PS: I found out that emotional manipulation doesn’t have much effect on mustard plants.
Step 9: Collect the seeds! The day finally came when the pods were dry enough to harvest. There is a small window of opportunity for this, and I almost missed it. After much obsessive checking and rechecking of the plants, I got out there one day and found that about 25% of them had already split open and dumped their seeds out. No problem though, because you don’t want to harvest all the seeds anyway. If you do, you won’t have any mustard next year. I carefully wrapped a plastic garbage bag around the long stalks and shook them so the pods fell off into the bag. You could also shake them into a bucket or something like that.
Now for the fun part. Take your bag full of dried pods and shake it all around. Rub the stalks around between your palms. Beat the ground with the whole thing. The goal here is to shake the little seeds out of their pods. I’m pretty sure this is called threshing, if you want to be farmishly accurate.
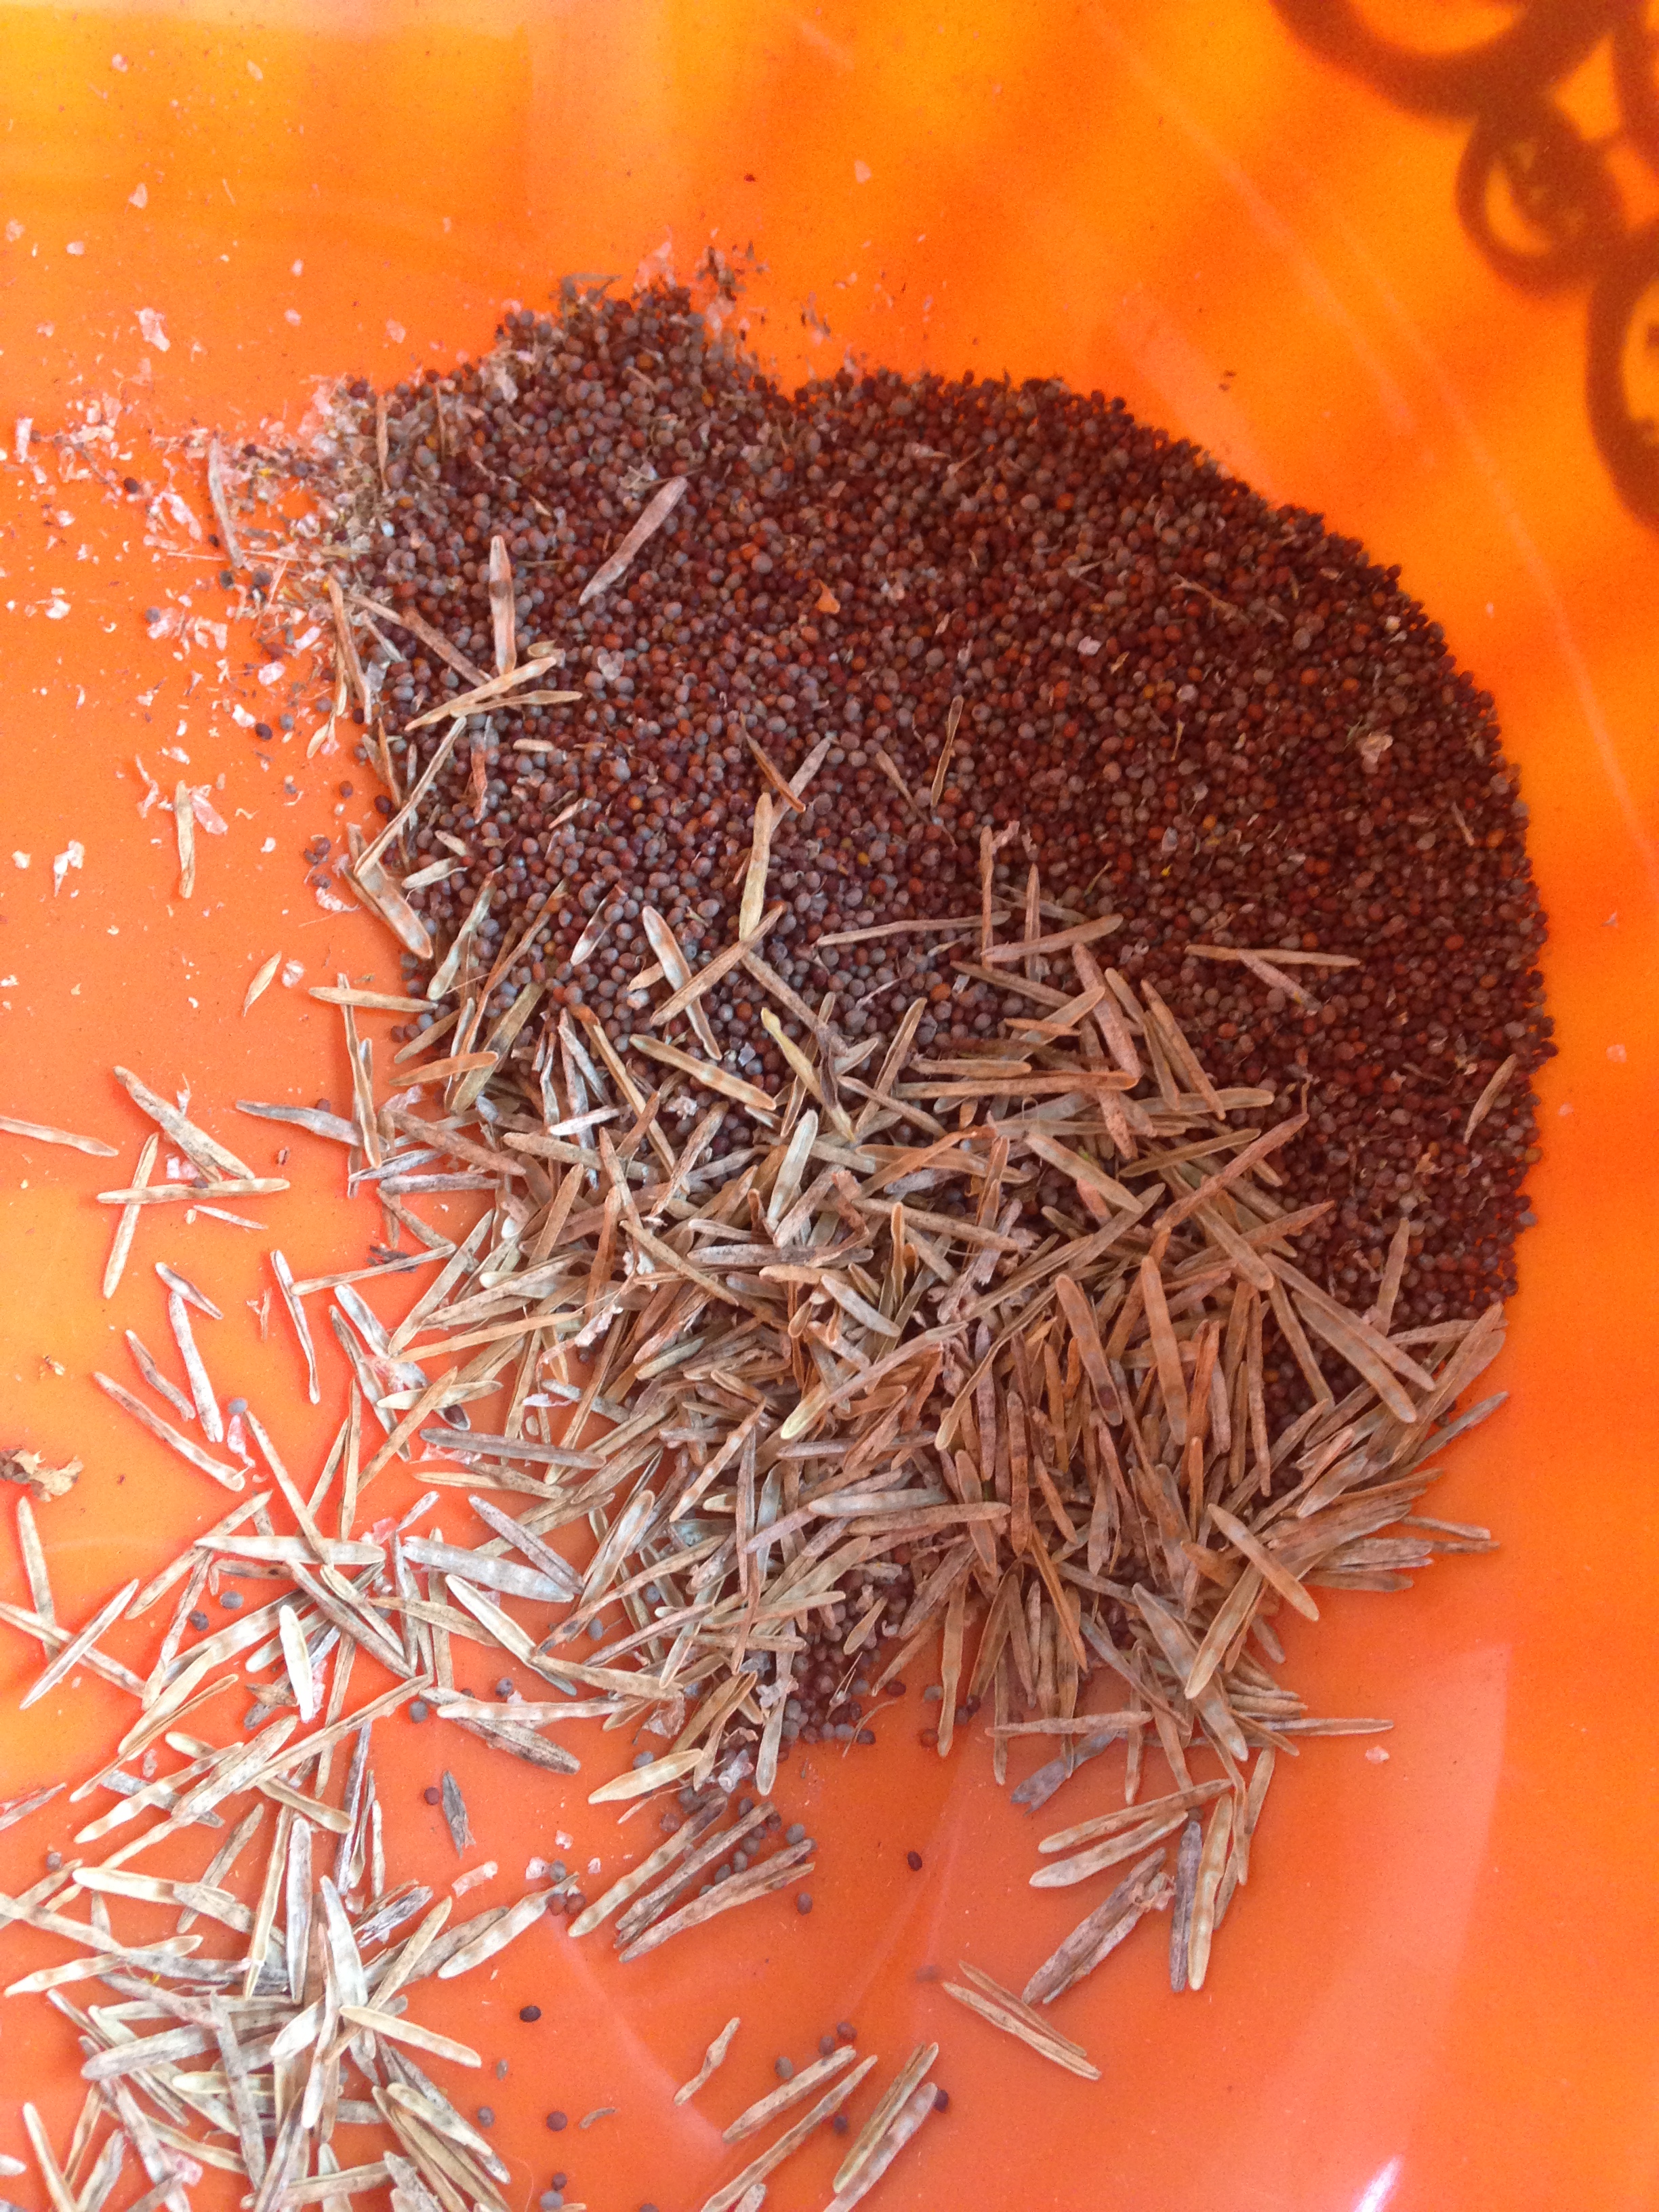
Step 10: Winnowing. Now you have a bag full of round mustard seeds and empty husks. You want to separate the two, and that’s called winnowing (another farmerly word). I saw some neat videos online about how to do this. My favorite was this one.
I did something similar, but a little less efficient. When you’re working on a small scale, you can afford to be inefficient and it appears that’s how I like to work. My way involved sifting the pods through my fingers and blowing on them to separate the lightweight husks from the heavier seeds. A nice breeze would do the trick too, but nature doesn’t always take my winnowing requirements seriously and a breeze didn’t show up when I needed it.
Step 11: Debug. Here’s something DIY articles never remember to tell you: there are going to be bugs and you have to get rid of them. I mean, you don’t have to but you probably want to. You know, for your guests.
Step 12: Soak the seeds. Give the seeds a good soak overnight in cold water or vinegar. I used a combination of the two. Cold liquid will bring out more of the mustard’s spiciness.
Step 13: Grind and season. I used a mortar and pestle for this. You could probably use anything grindy, although I can’t think of what that would be. Just get a mortar and pestle.
You should end up with a powder, or a paste if you added some liquid. You essentially have mustard now, but you probably want to add some more liquid and seasonings. Most recipes assume you are starting with ground mustard powder, so you should be able to use them to make any type of mustard you like. Or you can just add vinegar to taste and make your basic mustard.
Step 14: Grill up a brat and enjoy! A brat is like a hot dog, in case you don’t live in the Midwest and therefore don’t know what I’m talking about. And notice I said A brat, not a pack of brats. Because you’re only going to have enough mustard for one, despite all the work you just did. That’s the nature of homemade projects, I’m afraid. You need a lot of mustard plants to produce enough seeds to make a decent amount of mustard. But what you get in the end is definitely tasty and worth all the effort, just for the fun of it.

One thought on “A Lesson in Mustard”